Wednesday, July 30, 2014

Creativity within Constraints - Kimono Design 着物をデザインする自由・規則

You may recall that I dyed my own Kimono about a year and a half ago.
You might also remember that the whole process took a full 6 months from beginning (trying to get my brain around how you even design a kimono) to end!! (holding the precisely folded, shiny, freshly sewn, expensive beast in my very own hands) 
前に振袖を染めたと覚えていますか。
六ヶ月間もかかったことも覚えていますか?!「着物をいったいどうやってデザインするんの?!」という始点から、綺麗に仕上げて貰ったものを両手に持つ終わりまでに。

my kimono. started in September 2012, finished march 2013.

They say that things which you fear are probably the things that are most worthwhile doing. There's a mild pulse of terror going through me when I admit to myself that I may want to try dyeing another...kimono *gasp! There, I said it. I'm envisioning vivid flocks of parrots streaming across the sleeves of a pale heavy silk or white Corellas on a desert sand rusty orange background...
できないだろうと思うことこそすれば価値があると言われていますね。もう一回着物を染めてみたいと思ったら、恐ろしい気分になるのはそのためのでっしょう。怖いからいい経験になるでしょうが。。。薄い色の紬に、鮮やかなインコが飛んでいる着物とか、濃い落ち葉色の生地に真っ白のオウムの群の着物とか想像したら作りたくなります。

Little Corellas in Central Australia by Geoff Thompson 
But I'm held back from committing to it by a whole array of reasons and things I don't understand.
The thing that confounds me most when it comes to designing Kimono is the dilemma that you can do anything on a kimono but at the same time, you can't. There is this push and pull between absolute freedom and very defined limitations.

でも、分からないことばっかりで、色んな理由のせいで、「作ろう!」となかなか決められないです。
着物をデザインする際に最も分からないのは、着物に何の模様でもいいだが、同時に何でもいいというわけではない、という点です。つまり、完全な自由さがあるのに、かなり窮屈な規則もあるというアンバランスを感じます

the age of the wearer determines various features of formal kimono: brightness, size of motifs, level of decoration, sleeves...and on and on... 年齢によって礼儀もかなり変わりますね。袖、色合い、模様の位置など。
Colour, motifs, size of said motifs, sleeve length, fabric type, fabric weight, location of pattern on the body, amount of decoration, lining... these are just some of the variables you can adjust to give infinite outcomes. How about that for freedom of creative expression!?

色、模様、模様の大きさ、袖の長さ、生地の種類、生地の厚さ、体に模様がどこに来るか、装飾の程度、裏地など、これ以上の可変によって無限の違っている着物も作れるわけです。

the variations are endless....着物のバリエーションは無限でしょう。
Oh, but wait, that's right! There's also rules for each of those variables. Young women wear long sleeves, older women wear more subtle patterns, unlined kimono can't be worn in winter, heavy silk is too nice for everyday kimono, spring flower patterns shouldn't be worn in autumn, a giant flower that sits right on the wearer's behind when worn is probably not a good idea, et cetera, et cetera.
それで、上の可変の全部にもルールがあります!例えば、袖の長さだと20代の女には長い袖、50代には短い袖。50代だと模様を少なめに。冬だと裏地が付いていない着物が着れない。日常生活では、上級な絹は不適切。おしりの真ん中に来るデカい花模様は考え直した方がいいなど。考えないといけないことがいっぱいあります。

So while it seems like a creative free-for-all which then has all the fun taken out of it, this is something that is present in many art-forms in Japan. Take the example of Ikebana - Japanese flower arranging. I was actually a member of Ikebana club for one year at my university and it was the very embodiment of taking virtually any kind of flower or plant, and creating something of beauty within very strict principles.
着物はとても自由な「キャンバス」であっても、デザインする楽しさは全部ルールでおさえられると感じます。こういうコントロールは他の芸能にもよく見えます。例えば生花。生花では、様々な自然のままの枝や花を手に取って、それを決まっている形、線に従わせて、美しさを求めます。

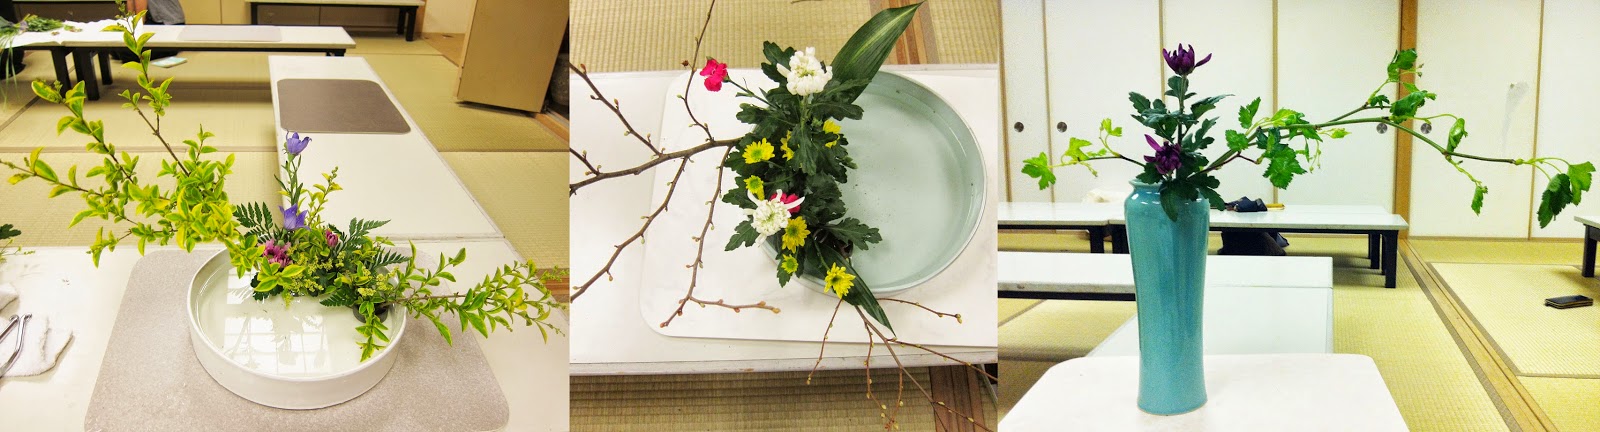
some of my arrangements from 1 year in Ikebana club. Arrangements have to take into account curves, negative space, colours, simplicity, shape of vase....嵯峨御流の華道部に入っていた1年間の写真から。色、花瓶、枝の形、花が咲く方向などを考えないと。
We were being taught to take into consideration the natural curvature of the stems you are working with, the spirit of each of the materials, the negative space created in the arrangement, the choice of vessel, the season, the angle from which to view it...and so on.
生け花にも、色んな事を考えないといけないです。植物の季節感、枝の自然の動き、枝の間の空間、器の種類、まだ咲いていない花はどこに咲いてくるとか。

I suppose what I am saying is that I am encountering this concept of 'controlled beauty' and finding that it is not an approach that comes naturally to me. 「抑えた美しさ」という考え方はなかなか慣れないわけです。

old kimono with a pattern of books
kimono with a pattern depicting the old capital, Kyoto

Despite the rules, (in terms of kimono these are probably just perpetuated and perceived rules, not as hard and fast as some would have you believe) there are some fantastic examples of fun, unique and sometimes just plain wacky kimono even from the Edo period (1603-1867). We are so used to the serene and conservative kimono of today that some of these designs seem pretty edgey. We tend to forget that there has always been innovation and boundary pushing; in every generation.
「ルール」にもかかわらず、(着物に対するルールは多分みんな思っているよりゆるいなんですが)江戸時代でも楽しい、独特の着物の例はあります。現在、晴着の着物に慣れてきた私たちにはこういう例は結構変わっているかもしれないが、どの時代にも革新的なファションがありますね。

Some great examples can be seen in so-called 'hinagata' booklets which flourished around the 1660's to the 1820's. They were basically printed catalogues of fashionable kimono designs which were used by dyers and kimono producers as a kind of custom order starting point. The black and white line drawings give a broad design idea which a customer could then have dyed to their size and colour preferences. Some of these would have been pretty interesting if they were actually created. (These books are amazing, I think I'll have to do another post just on hingata)

「雛型本」(ひながたぼん)には色んな着物デザインが見えます。雛型は1667年~1820年ごろに刊行されました。「小袖のデザインブック」のような本で、客さんの好み等に合わせて独自の着物が作れたガイドでした。

two-page spread of fairly classic kimono designs in a hinagata book. 雛型に見える古典的な着物デザインもあるけど。。。
or how about some scholarly young boys all over your kimono!?
or a selection of caged animals? 籠に入っている動物の模様どうですか?
perhaps some swords...I guess this is intended for Men's or Boy's kimono刀の模様。多分男性用。
This design appears to be imitating imported block printed designs これは更紗に似ていない?
Perhaps some flower arrangements dancing around your back? 生花はいかが?!

When I made my first kimono, I think I was trapped by ideas of "what a kimono should be like" and also some professors seemed to be telling me certain 'rules' about kimono. But you know what, after seeing these old hiinagata and looking around me, the kimono is as diverse of a  'canvas' as it is standard. 
私は初めて着物を作った時、「着物はこうだ」と硬く考えていたと思います。でも、雛型の独特の着物やあちこち着られている着物をよく見たら、着物のなかで信じられない多様性もあります。

Anything goes: Designs 67 & 68 from this particular hinagata book, showing design options for some very extravagant hem linings.
Like any venture into a field you are inexperienced in, the more you step inside, the more you realise just how deep and vast the place is! You scrape the surface of kimono design and realise what a can of worms it is. Having sort of bluffed my way through my first kimono I am having visions of can after can of worms if I were to dye another one.
素人として新しい分野へ入って勉強すればするほど、自分が何も知らないと分かリます。着物の世界も、知識が深い玄人がいっぱい居ますし、とても複雑な勉強だと思います。初めての着物をなんだか染めましたが (ビギナーズラック)もう一回染めたら、色んな失敗が出そうです。 

I also have doubts about dyeing kimono as a foreigner. Whilst in no way do I have plans to make some kind of sloppy imitation kimono or treat it like a novelty, I am worried that people may see it as an unusual novelty, once they know I am not Japanese. This is an idea I come across often in making my work in traditional techniques and I don't think it is easily explained away or ignorable. I am still feeling with this topic and I'm still not sure how I feel about it.

Japanese fashion
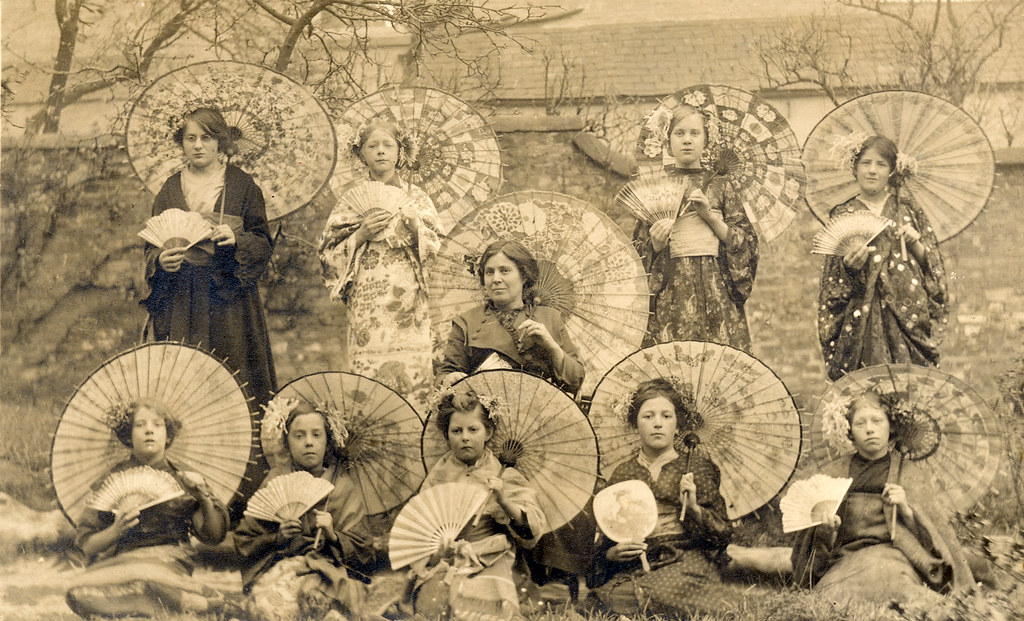
foreigners + kimono. contentious. from flickr
But Kyoto is THE Textile and kimono industrial centre of Japan. Around me I have the facilities, the space, the tools, the traditional materials, the old traditional shops selling the various fabrics, the teachers with the knowledge to impart...
Perhaps it's time to take the risk of being misread and just put my parrots on a kimono. 
色んな疑問があっても、京都って染の中心地であり、作らないのがもったいないかもしれない。京都には染める場所、設備、道具やさん、生地やさんもあって、知識を持っている先生もいます。
日本に居る間にしか作れない独特なインコの着物を制作してみようかな。。。

Katazome Artwork Process Video 型染作品の行程

I finally got down to compiling videos I took back in March into a sort of summary of the Katazome process. There are some parts skipped and steps I forgot to make a record of but hopefully it will give you nice overview of the technique.

Thursday, July 17, 2014

Budgerigar murmurations on linen セキセイインコの群が舞い上がった。

At what point does a flock of birds cease to be beautiful and start to become overwhelming or even grotesque? Perhaps when they number in the hundreds of thousands and form a moving, evolving mass that moves across the sky in unbelievable formations.
鳥の群って、何匹で美しい光景からグロテスクなものになるのだろう?何万匹の鳥が一つの巨大な生き物になって空を流れて行っているのはそのところかもしれない。

This was something I wanted to explore in my new artwork "Murmurations".
最近の作品「Murmurations」(流動的な大群の意味)にはこういう風な巨大群をテーマにしたかったです。

凄いでしょう!?スコットランドでのムクドリ大群。I mean, seriously?! Murmuration of Starlings in Scotland. More images from BBC here

A few posts back, I shared with you a little about these flock formations called murmurations. The most well known of these dancing, swarming, phenomena are those created by starlings in various parts of Europe. But in true Aussie style, not to be outdone by the old mother country, we have our own version, and I would say its a whole lot more amazing.
いくつかの投稿前に、この「Murmuration」について書いたと思いますが、一番知られているのはヨーロッパで見えるムクドリの大群の光景です。しかし、オーストラリアにはもっと鮮やか、もっと豪華なバージョンがありますよ!

Budgerigar murmurations!
セキセイインコの大群!

オーストラリアの中心に見えるセキセイインコ大群。Budgie Murmurations in Central Australia by Steven Pearce
綺麗でしょう!Budgie Murmurations in Central Australia by Steven Pearce

Budgerigars which are well known around the world as caged pet birds are actually Australian native parrots and remained that way up until the early 1800's. In the wild, they are intelligent little creatures with vividly coloured green and yellow plumage and slender bodies. They form these giant flocks in order to better locate food and water and to make things difficult for predators like falcons.
セキセイインコといったら、世界中に飼い鳥のイメージが強いですが、実はオーストラリア原産の野生インコです。19世紀の初めまでにそうでした。野生のセキセイインコが鮮やかな黄緑で、賢くてすらりとした鳥です。こういう大群になると、水や餌をより簡単に見つけれるし、ハヤブサなどから逃げやすくなります。

Budgie Murmurations in Central Australia by Steven Pearce
I wanted to depict budgerigars in these formations, wild and on mass; the complete opposite image of the fluffy, variously coloured, singular budgerigar pets we are now so used to.
作品では、鳥籠に入っている一匹の青とかグレーのふわふわなセキセイインコのイメージを逆にして見たかったです。

From Canberra Times article: Wild budgerigar at left versus modern caged budgie. It's like putting a little flyweight next to an Arnie... 左は野生のインコ、右は慣れて来た飼い鳥のセキセイインコ。普通のサラリーマンと力士を並べてみているって感じ。
So here is my take on Budgerigar murmurations:

Murmurations 2014. 240 x 180cm


budgies in flight
Whilst this work is not as big as I might have liked (about 180cm tall x230cm wide), it's still of a scale that envelopes you or overwhelms you, I hope. もっと大きく作ってもよっかった気がしますが、圧迫感はあるでしょうか。

I made this work using katazome and over-dyeing. The idea of 'en masse' and repetition seemed best done in a technique that is repeatable. I cut about 20 small budgerigar stencils, some singular birds, some a set of two or three birds. I made various sizes, ranging from small parrots to be used in the "distance" and larger ones to create the effect of a "foreground".
型紙へトレースTracing Budgies
onto Katagami stencil paper

この作品を型染や引き染めで作りました。型染っていう技法では「繰り返す」ことは大事なので、複数の鳥を染めるにはちょうどいいと思いました。20枚ぐらいのインコの型紙を彫りました。大きいのも小さいのも。

Cutting budgie stencils: one of
 the fun parts!
型紙を彫るのが楽しいよ!
Because I planned to use these katagami stencils over and over again, I decided to strengthen them with a layer of fine synthetic mesh called "sha". You attach this to the front of the stencil with a thinned down lacquer. Usually, this is used to print paste with the mesh-attached side facing up. I wasn't sure if I could flip the stencils and use them to print with the mesh on the fabric side but I was able to just fine. This meant I could use the same stencils for flying budgerigars facing in both directions. (Less stencil cutting!)


Hard to see but this stencil has a fine mesh attached to the front surface with a black lacquer. stinky stuff but it makes the stencil much stronger and more versatile. 紗を張った型紙。張る時に使うカシュ―のにおいがきついですが、紗がついていると使いやすいし、丈夫になります。
Here's a few more low quality photos (sorry!) of the work in the making! 制作中の写真を何枚か、


in the middle of pasting the budgies using various stencils. You can see the blue aobana ink on the fabric which i was using as a rough guide and later dissolved in water. 糊置きの途中。生地に見える青い線はまたあとで水で消える「青花」です。
explaining my work to some wonderful Australian ladies who happened to be visiting Kyoto and Nara on a textiles tour. Good fun! 京都と奈良へテキスタイルを見に来ていたオーストラリア人のおばさん組に自分の作品を説明最中。楽しかった! 

first dyeing finished, paste still on fabric. 1回目の色差しを終わった時。糊はまだ生地に置いている。
first dyeing finished, steamed and paste removed 一回目の色差しが終わって、蒸して、糊と余った染料を見ずで落とした。

This work will be in display for the first time at a 3-person group exhibition starting next week. It will be at a gallery in downtown Kyoto, Gallery Maronie, which is quite well known for shows of contemporary art and craft. More details here. Although it's very hot in Kyoto at the moment, here's hoping we get a pretty good turnout. Perhaps people will flock to see it?!? Hardy har. And that terrible Dad joke I'll take my leave to go and finish the hand sewing on the other piece I will exhibit next week!
この作品を初めて展示するのは来週からのグループ展でします!京都の四条河原町に近い「ギャラリーマロニエ」に京都精華大学染織コースの大学院生3人でやる展示会です。詳しいことはここへ。京都は今の時期すごい暑いけど、たくさんの人が見にくれるのだろう。群のように?!へへ。また展覧会場の写真を見せます。とりあえず来週までに一つの展示する作品を仕上げないと!

「外から来た人たち」ギャラリーマロニエ2014年7月22-27日 京都 3 person group show at Gallery Maronie in Kyoto starting next Monday (July 22nd) and running until Sunday July 27th. 

Tuesday, July 15, 2014

Katagami - An Artwork in Itself 型紙自体も作品

Late in May (how is it mid-July already?!) I went on a whirlwind day-trip with a friend in search of Katazome and Katagami. We headed first to Nagoya to see a large-scale exhibtion of my professor Toba Mika's Katazome artworks and then we jumped on another train to Shiroko in Mie Prefecture to visit the Ise Katagami Stencil Museum. 五月下旬(まさかもう7月の中旬ですか!?)型染と型紙を見ようとした冒険に行ってきました。ギリギリ日帰りで行けない三重県の白子と名古屋の清須へ行って、鳥羽美花の型染展と伊勢型紙資料館も見えました。

"From the Eternal Place Beyond Time and Space"
The exhibition was Toba Mika's, "From the Eternal Place Beyond Time and Space" held from April 12-June 8 2014 at Kiyosu City Haruhi Art Museum, just outside of Nagoya City. 鳥羽美花展は愛知県清須市はるひ美術館で開いていた「「時空を超えて―辿りついた場所より」 でした。

Toba Mika "Leaving Da Nang" 2001 197x570cm

I had seen a lot of my Sensei's artwork before but never so many at once. Toba-Sensei is working in katazome, creating large-scale folding screens that are vibrant and painterly. Her imagery alternates between that of Japan and scenery of Vietnam. I am always impressed by her use of colour, in particular the way she can use many different colours and tones of dye within one piece and yet makes it look so unified.
今まで鳥羽先生の作品は何回も見える機会がありましたが、このように一つの場所にたくさんの作品が見えるのは初めてでした。鳥羽先生は大きい屏風等の作品に、日本やベトナムの風景を型染で染めて描写しています。色の感覚は素敵だといつも思います。一枚の作品にあんなに沢山の色を使うのに、違和感がないのはすごい尊敬しています!

"The place to embrace calm" 2007 230x540cm

Toba-Sensei also has a unique way of incorporating texture into her work using coloured nori resist paste, that is, paste mixed with dye. By using this in areas she is effectively printing though detailed stencils directly with dyes. I think this effect helps to soften the harsh sharp lines of katazome and adds a further layer of interest. また、「色糊」の使用によって、鳥羽先生は型染の作品にもう一層の面白さを加えていると思います。型染の硬い線を柔らかくする効果がある気がします。

Detail showing texture from Toba-sensei's "Labyrinth"

Toba-sensei's folding screen on display in Vietnam 2013

Most impressive though was a display of Toba-sensei's hand-cut katagami stencils hanging in the second-floor space of the museum with it's 360 degree glass windows. Because her works are large, (often a set of panels measuring at least 90cm wide by 2 metres or more tall) it means that Toba-sensei's katagami stencils are accordingly of a matching grand scale. Seeing them hanging there in the space you could see how detailed and yet enormous they were. 今回一番感動したのは、はるひ美術館の二階にあるガラス張りの部屋に飾られた「型紙」の展示でした。鳥羽先生の作品が大きいから、当たり前ですが、型紙も大きいです。目の前につるされて、裏に緑の畑の風景が見えたり、風に動いたりしていた型紙の細かさを改めて気づきました。

just one corner of the katagami display on the second floor. image taken from this site.

Image from Toba Mika describing the steps in her katazome process

To the viewer with no knowledge of katazome or textile dyeing, they are beautiful hand-cut artworks. If you know about katazome then you know what these stencils are destined for and that they are just one stage in an involved process. But that doesn't lessen their beauty. Actually, as someone doing katazome it was interesting to see the stencils displayed in that way because we get so used to seeing then just as a tool or an implement in the process and roll them up and stash them away once we've printed the resist paste through them. Seeing them hanging there in all their glory reminded me the stencils are an artwork in themselves too.

型染や染色が全然知らない人には、展示した型紙はただの綺麗な作品だったかもしれないですね。でも、型染をやった人っだったら、この型紙は、複雑な工程の中に使われる道具を過ぎないと思ったことがあるでしょう。型染をやっている人々は、型紙を糊置きに使い終わったら、どこか暗い場所に置いてしまうから、ただの道具だと考えるのを慣れて来たはずです。なので、そうゆう風に飾られた型紙を見て、型紙自体もとても美しいし、作品なのだと思いました。

the cover of one of Toba-sensei's catalogues shows details of a stencil of finely cut cherry blossoms.

The katagami stencil paper that Toba Sensei and many other contemporary dyeing artists use today is a wide, plastic-like paper. Traditional Katagami (or shibugami) was something much more sensory; darker in colour, produced in smaller sized textured sheets and with a strong smell you won't quickly forget. 鳥羽先生や現在型染をする人の多くは、昔と違う型紙を使っています。水で縮まない、幅が広いプラスチック製の物です。昔に使われた型紙(又は渋紙)はまた違うものです。小さい一枚ずつは手触りが粗くて、色は濃くて、記憶に絶対残り香りもします。

Katagami 'Autumn Sakura' from the Tanaka Nao Collection held at Kyoto Seika's Gallery Fleur. Edo Period 京都精華ギャラリーフロール所蔵の型紙。江戸時代。「秋桜」

What is now known as “Ise Katagami” has been produced in the Suzuka area of Mie Prefecture for over 1000 years. Katagami was used in the dyeing of patterns on Kimono and other fabrics. Thanks to a painting by Kano Yoshinobu (1552-1640) depicting an artisan using katagami, we can assume it has been around since at least the Muromachi Era (1336-1573).
Katagami production flourished during the Edo period thanks to it’s popularity for understated kimono pattern dyeing but today the stencil paper is only manufactured in Shiroko in Mie.

現在「伊勢型紙」と呼ぶものは三重県には1000年ぐらいの歴史を持っています。室町時代からの狩野の絵に型紙を使っている職人さんが描写されているから、最低室町時代から存在していたものだと思われます。

Painting by Kano Yoshinobu depicting a dyers workshop

an eye-popping Pine-tree stencil design using circular punches, from the Tanaka Nao Collection, Gallery Fleur, Kyoto Seika University Katagami Collection 切彫りの型紙「松」。京都精華大学ギャラリーフロール所蔵

The paper is made by layering 3 pieces of fine Kozo washi (paper from mulberry fibre) in alternate directions and then painting them with astringent Persimmon juice. This is left to dry in the sun and then hung and smoked in a room which gives it this amazing woody, cinnamony smell. The whole process takes about a month and half before even taking a blade to it!
3枚の和紙を重ねて柿渋を塗ってから燻すものなので、初めて買うと凄い香りはします。だんだんなくなるのですが、最初は焦げた木か、シナモンか、大好きになった香りはします。一か月半の生産が終わったら、ついにそれを彫ります。彫るには4つの技法があります。

There are four main techniques for carving Ise-katagami stencils:

1. Shaped punches dougu-bori 道具彫り

Shaped punches. including Petals, rice grains, sea cucumbers, waves, horse hooves, fish scales... Chart from specialist Katagami shop Osugi, they are so friendly there! http://www.osugi.co.jp/

The blade tips of these punches are specially made into tiny shapes like sakura petals or crescents or waves. The carver holds the punch upright with their left hand, steadies the blade tip with the right and then pushes the punch perfectly straight with their cheek! It sounds a little odd but it enables them to work quickly and accurately.
桜の花びら、波、米などの形に作られた細かい刀で型紙を彫ります。この場合は小刀を慎直に持って、ほほで押すという不思議なやり方です!

2. Semi-circular punches kiri-bori 錐彫り

The metal blade tip on these punches is a semi-circle. The action of pushing it into the katagami stencil paper and rotating it results in cutting a full circle shape. Patterns are created by repeating these very fine circles and often various sized circles are used to create clever effects. Apparently there are examples of katagami that have 100 circles cut within 1cm2 !!
半円形の小刀を型紙に突いて回したら、円形が彫れます。様々なサイズの円を合わせて面白い模様ができます。1センチ四方に100個のまるが切ってある例があるらしいです!

3. Freehand Cutting tsuki-bori 突き彫り

whaaaaat!!?? へえええぇ!?細かい突き彫り。

This is apparently the oldest carving technique and the one that is maybe most akin to contemporary katagami carving. In the case of tsuki-bori, the blade is not dragged to slice the paper but pushed vertically through the paper with a kind of sawing action. A mat with a hole in it is placed below the paper being carved to allow the blade to pass through the layers of paper without damage. The blade for these intricate patterns can be as small as 3mm wide and 1mm thick.
突き彫りはもっとも古い彫り方だそうです。小刀を引っ張って切るのではなく、まっすぐに押して、上下に動きながら切っていくという感じです。突き彫りに使う小刀は小さいと幅3ミリ厚さ1ミリだそうです!

4. Striped Designs shima-bori 縞彫り


These finely striped stencils are carved with a small blade and a metal ruler. Once cut, these very fine lines are held in place with a net of fine silk threads that keeps the stripes straight and the whole stencil in one sturdy piece. The impressive step in this technique comes once all the stripes have been cut and the layers of katagami that were stacked up during cutting are separated from each other and what looks like brown hair falls away. Such fine work!

定規と小刀で細い縞模様を彫る方法です。最後に残っている線動かないように、絹の糸を横に付けます。

These techniques are being practiced, documented and kept alive by the so-called “Association for the preservation of Ise-Katagami” which has been classified an ‘Important Intangible Cultural Asset’. Check out this beautiful video that shows 5 members of the association demonstrating carving stencils using these techniques. 伊勢型紙技保存会で様々な知識を残そうとしています。このビデオはとてもいい感じで、保存会の5人も登場します。ぜひ見てください!


I think this is one of the great things that sets Katazome or Textile dyeing apart from just "Art". There is this extra layer of history, of techniques and of tools that are all behind the scenes and whilst unknown to the viewer of the final piece (and in come cases unbelievable to them), these things all form an important part of making the work.
型染や染色がこの技術・歴史・道具のことで「アート」とはちょっと違って、素晴らしいと思います。このもの全部出来上がった作品には見えないですが、制作に欠かせないものです。

It was a nice experience to see the hidden background tools of Katagami being shown off and highlighted for what they were: not simply tools but beautiful objects in themselves.
普通は皆に見せない道具に焦点を当てたことで、ただの道具じゃなく、そのもの自体も美しい作品というだと感じました。